
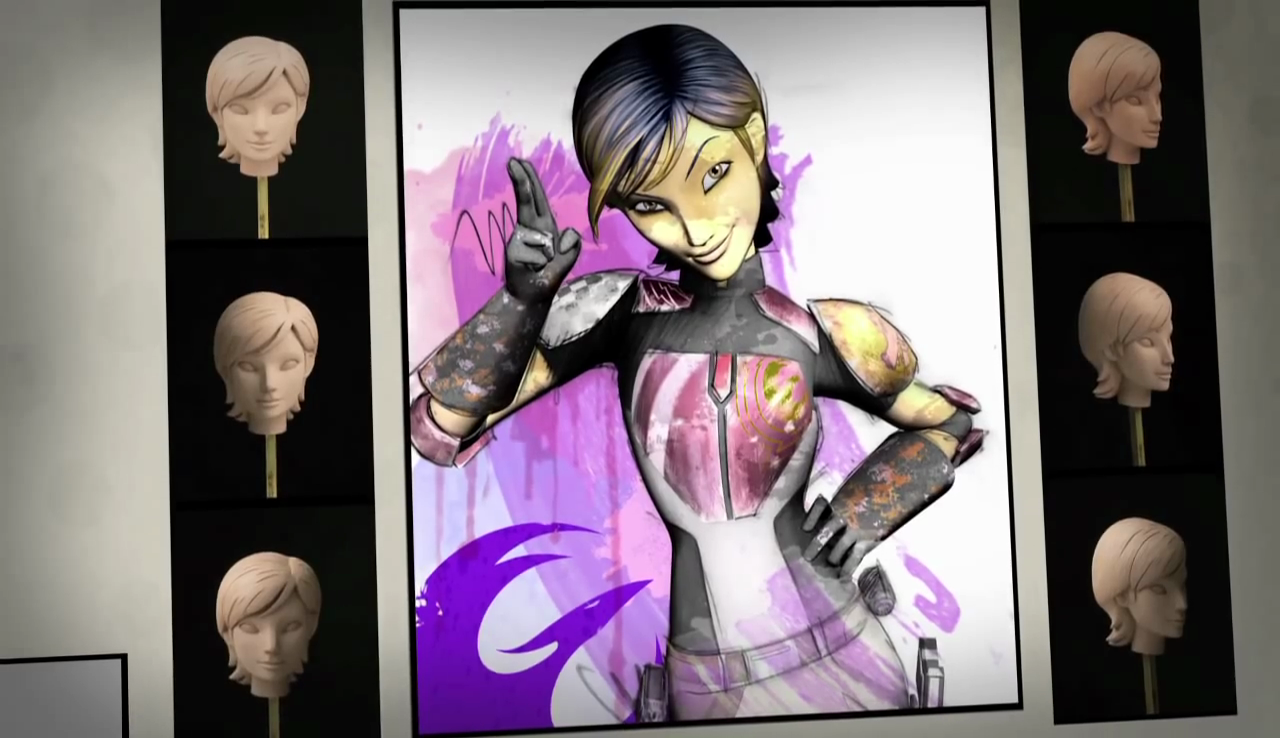
In our family Sabine’s journey is an interesting one. When we met the character in the original Meet Sabine video…
we caught our first glimpse of something we’ve never had in Star Wars before.
An artist.
Liz was sold.
At the time she had the same haircut and she basically fit the character look perfectly already!

So I Gathered My References….
As I said before (In Kanan’s Costume Journey) we built our costumes before Star Wars Rebels aired so once again, pulling apart this video was pretty much all the reference I had to work from.
So set to work I did….
Grabbed everything I could, which in Sabine’s particular case led to a lot of issues. There were many differences from renders and concepts especially concerning her designs….

Like in this image she has a lightning bolt on her left chest armor piece.
… Here she has the starbird but it almost looks metallic and golden.
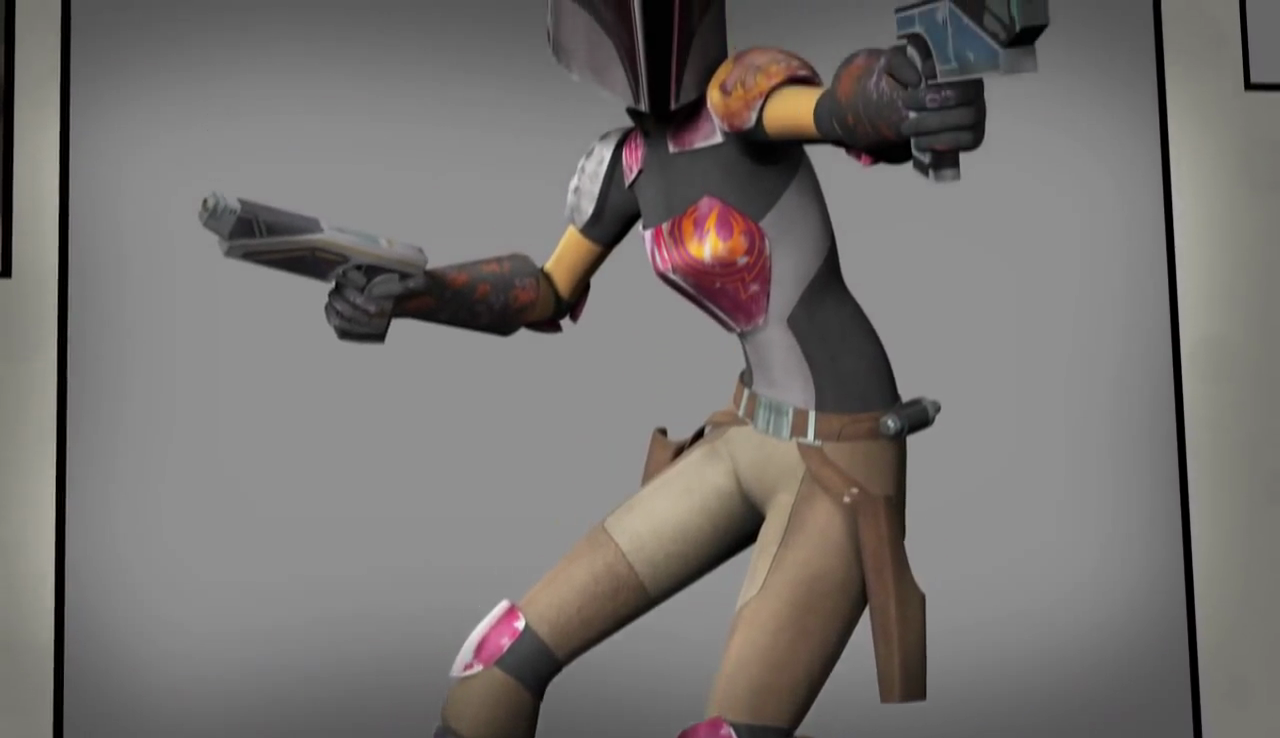
Here I can see it’s a starbird but the outlines are hard to make out.
And that’s not even the addressing trying to get a clear shot of her shoulder anooba!
We had to guess how much was changes and how much was artist interpretation but with so little to work with it was hard to throw anything out.
I pieced it together the best I could and made my list.
- Brown/Tan paneled pants
- Black/Grey paneled collared shirt
- Leather belt with double holsters.
- Black wedge heeled knee high boots
- Long leather/rubber black gloves
- Helmet
- Collar armor
- Chest armor
- Shoulder armor
- Elbow pads
- Knee pads
- Boot armor
- 2 x Westar-35s
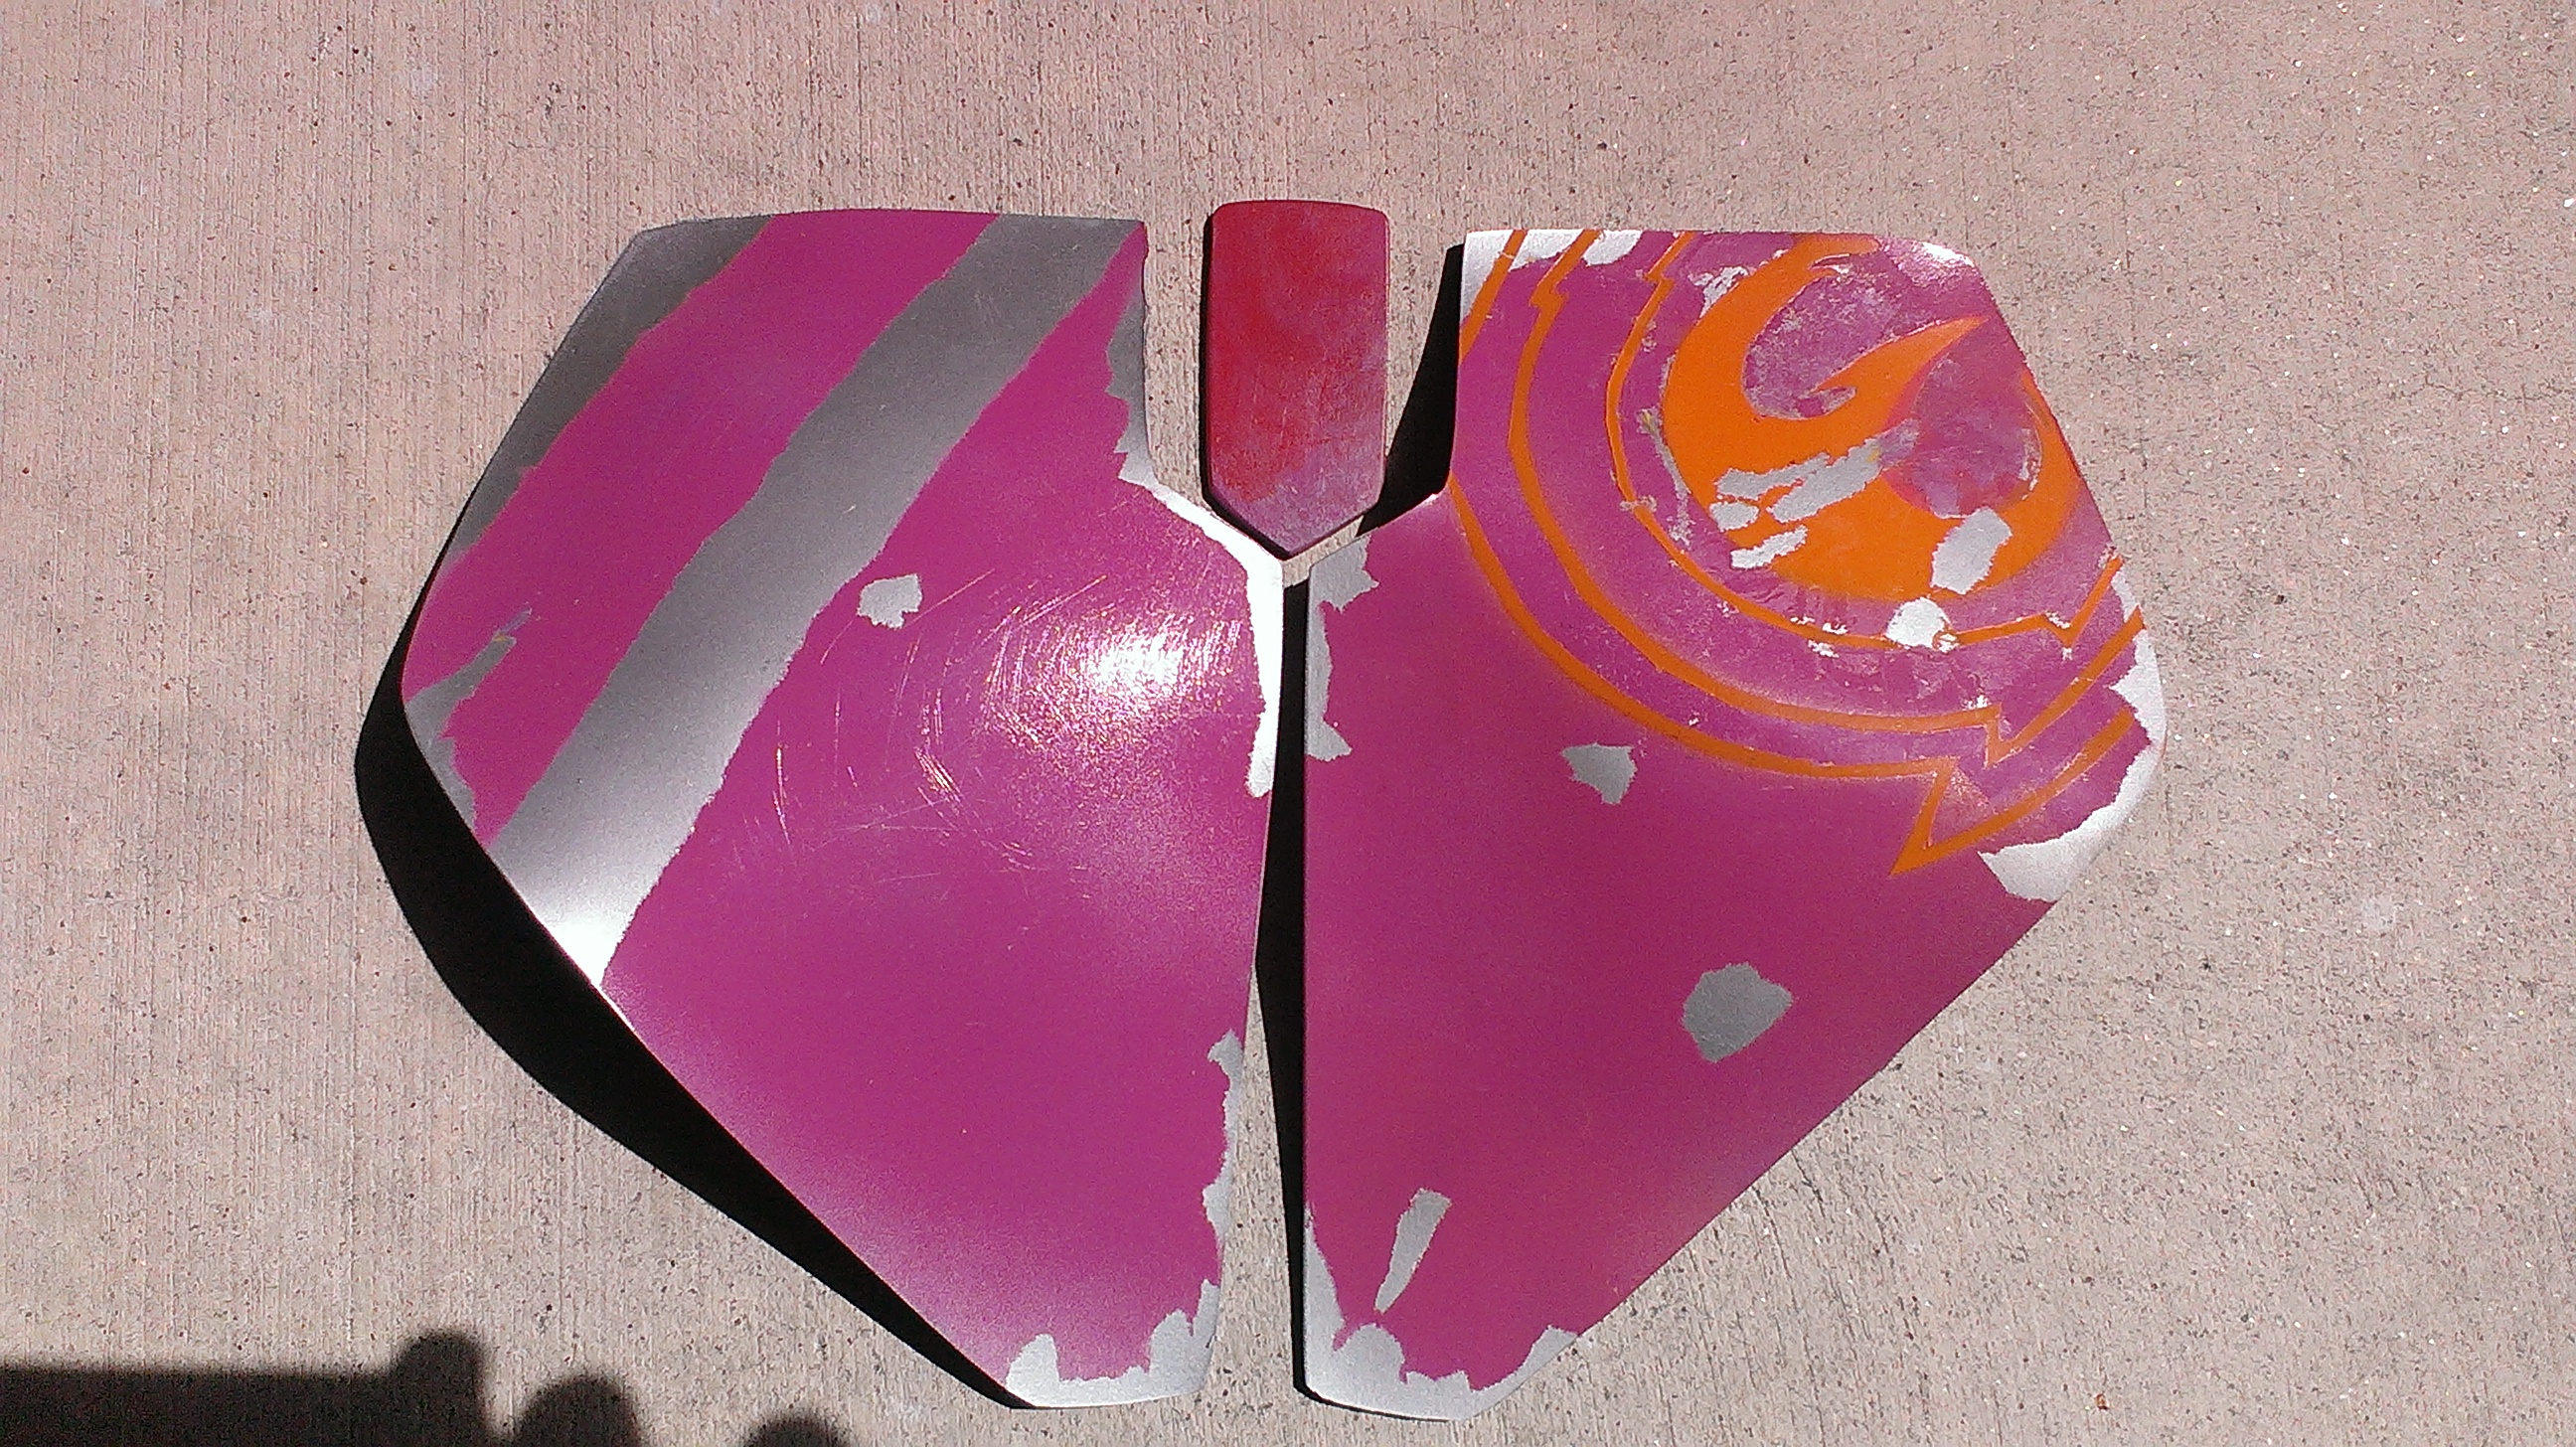
And of course getting the paint job right was going to make or break this armor so I started looking for all the colors I’d need. The base color was a bit hard to nail down because in some lights it looks more purplish, other times more reddish, and sometimes a bit more pinkish, and getting that to tie it all together would be important.

The Hunt for Materials
I hit my thrift stores and looked at all the spray paints around. A Mandalorian Merc friend of our offered to form us up some armor pieces so I wouldn’t immediately have to learn how to heat form. Picked up some cheap rubies Westars and some athletic shirts and pants to try to Frankenstein into her paneled clothing. The boots were a pain but we found some decent cheap ones.Which pretty much covered everything….
except the helmet.
The Build
The Pants
We grabbed a few pairs of fitted leggings in the colors we needed. After searching for so long for brown leggings for Aayla Secura, I had an easier time finding these ones since I already knew where to look. So I cut them apart and tried to sew them together…
I failed.
Had to go out and buy some more but this time we took them to a seamstress. Since she actually knew what she was doing everything came out much better.
The Shirt
After learning my lesson with those pants the shirt went to a seamstress and they both came back perfectly.
Once again I need to stress how important it is to find a good seamstress. While there are lots out there that have the skill to make what you need, the honesty in pricing, and timing is very important to us. In this case we took it to a professional who said it would be done Tuesday and we picked it up Tuesday. You don’t want to miss an event because an important piece of your costume wasn’t ready when your seamstress said it would be.
The Belt
Showed the designs to another costumer and he was able to whip us up a pretty perfect belt. I did my best to go watch how he patterned and made everything so that I could learn how to make my own in the future. Any skill you can pick up will make costuming that much easier and cheaper! My biggest obstacle right now is sewing but I’m trying to improve every chance I get!
The Boots
Finally found a great pair and hit it with paint splatters! Sabine has some painting to do that’s easy and fun!
The Armor
Thanks to our Mandalorian friend we had a set of armor to start with.
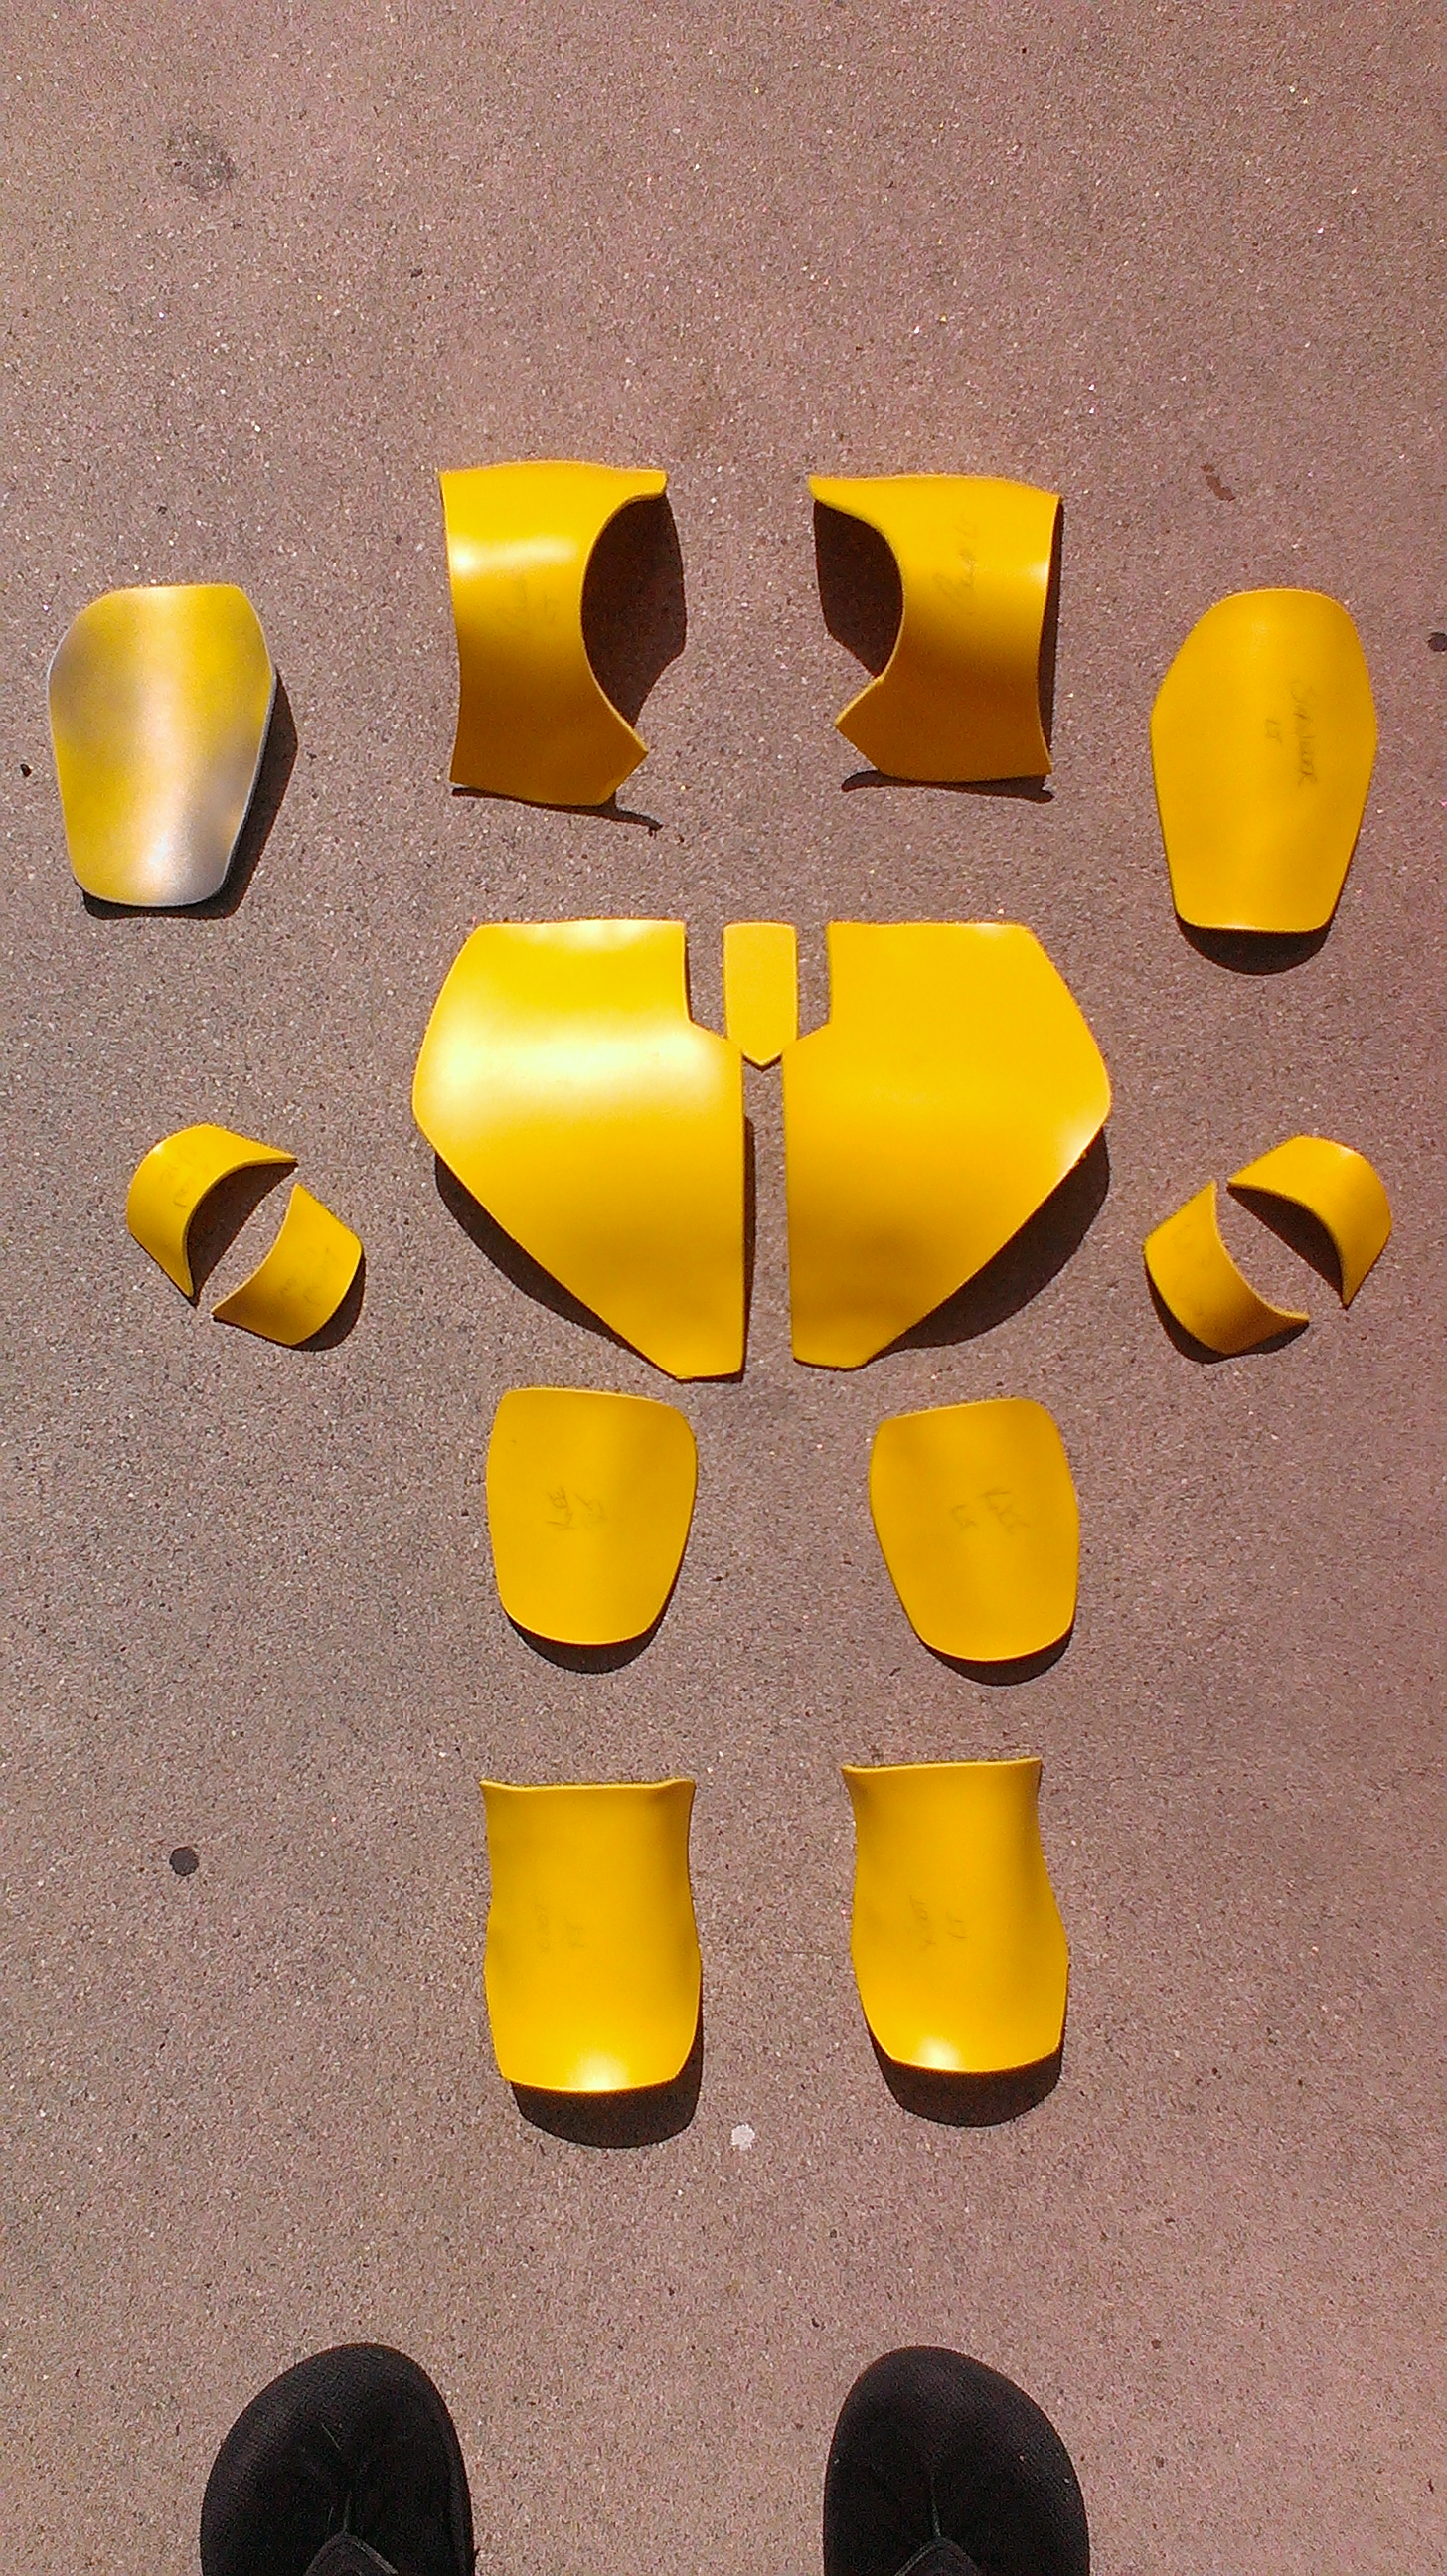
And I had my paints ready to go

So I started putting it together.

I had heard of this toothpaste weathering technique where once you’re done painting you wipe off the toothpaste and are left with weathered minty fresh armor!
I liked the idea but I didn’t like how the weathering comes out very chunky and unnaturally clean….
Buuuuut at the time I didn’t know any better techniques so I went with it.
The designs and stenciling were the most challenging and I felt they were very important to the armor. Unlike Kanan’s armor I felt her paint and design should be deliberate and beautiful as if it was painted by an artist…
… except it was just me….

So I did my best and pencilled everything in lightly until I felt it was perfect… enough….
So it all came together pretty well and we worried about the next thing on our list!

The Gloves
We couldn’t find anything that kind of held it’s shape along the arm the way Sabine’s gloves do. We searched long and hard and eventually settled…
… on rubber dishwashing gloves.
Flipped them inside out hit them with matte black and some grey for weathering and splattered them with Sabine color! I still haven’t found anything that looks better.
The Hair
After considering all the options Liz went in full throttle and to the salon we went!

Totally a first she got cut and colored up and came back out total Sabine.

There was one important piece left.
The Helmet
We had seen such few pics of it but we knew it was somewhere between and Night Owl and a classic Boba Fett. We found out that Mandalorian Arsenal was working on one and planned to have it ready in time. We got on that list and waited.
A week and a half before Wondercon (which was our deadline) we received our first helmet.

Not really knowing anything about cleanup and finishing work we turned to somebody we knew who knows a lot about that subject. Marcus of NME Props. Luckily he was available to help us out on our short deadline and after Marcus’s expert trimming, assembly, reshaping, and badass cleanup we had a helmet.

So taking what I had learned about painting from the armor I set to work.


There’s no way I would have ever been able to get the helmet looking this good without help.
Thanks Marcus
I owe you one.
Accessories
I painted up the westars and tossed them in the holster and Sabine was ready.

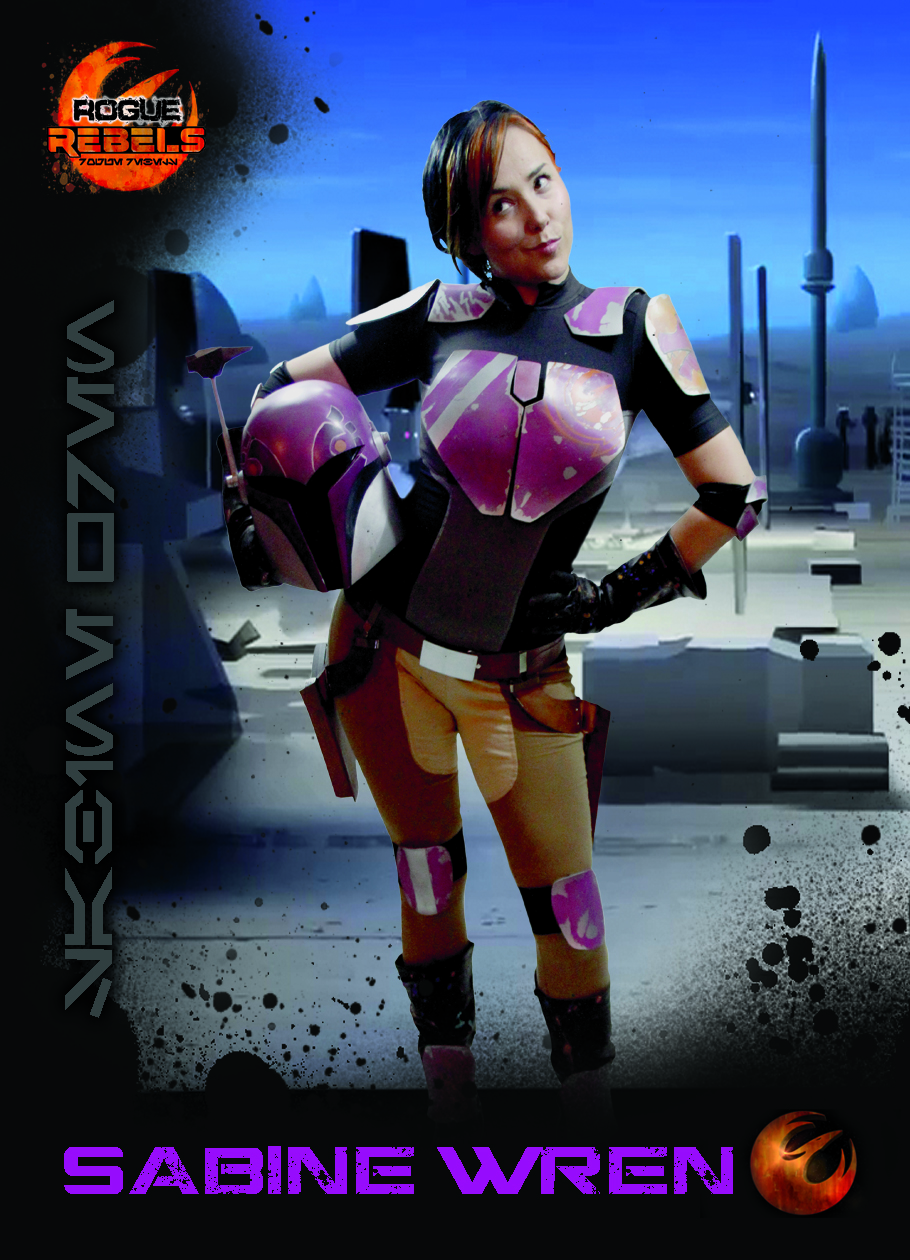
Our First Mission
We head out to Wondercon to the first Star Wars Rebels panel ready to go. The feedback was incredible! We found some of the crew and snapped a few pics


We were so happy but soon the show was going to air! And once we’d seen Spark of Rebellion we knew were going to have to make some improvements.
And now that we had better references it was time to make some changes.


One thought on “Rogue Rebels Costume Journey: Sabine Wren, Part 1”